
Two Simple Pathways to Making
Perfect[1]Prints from Digital Negatives
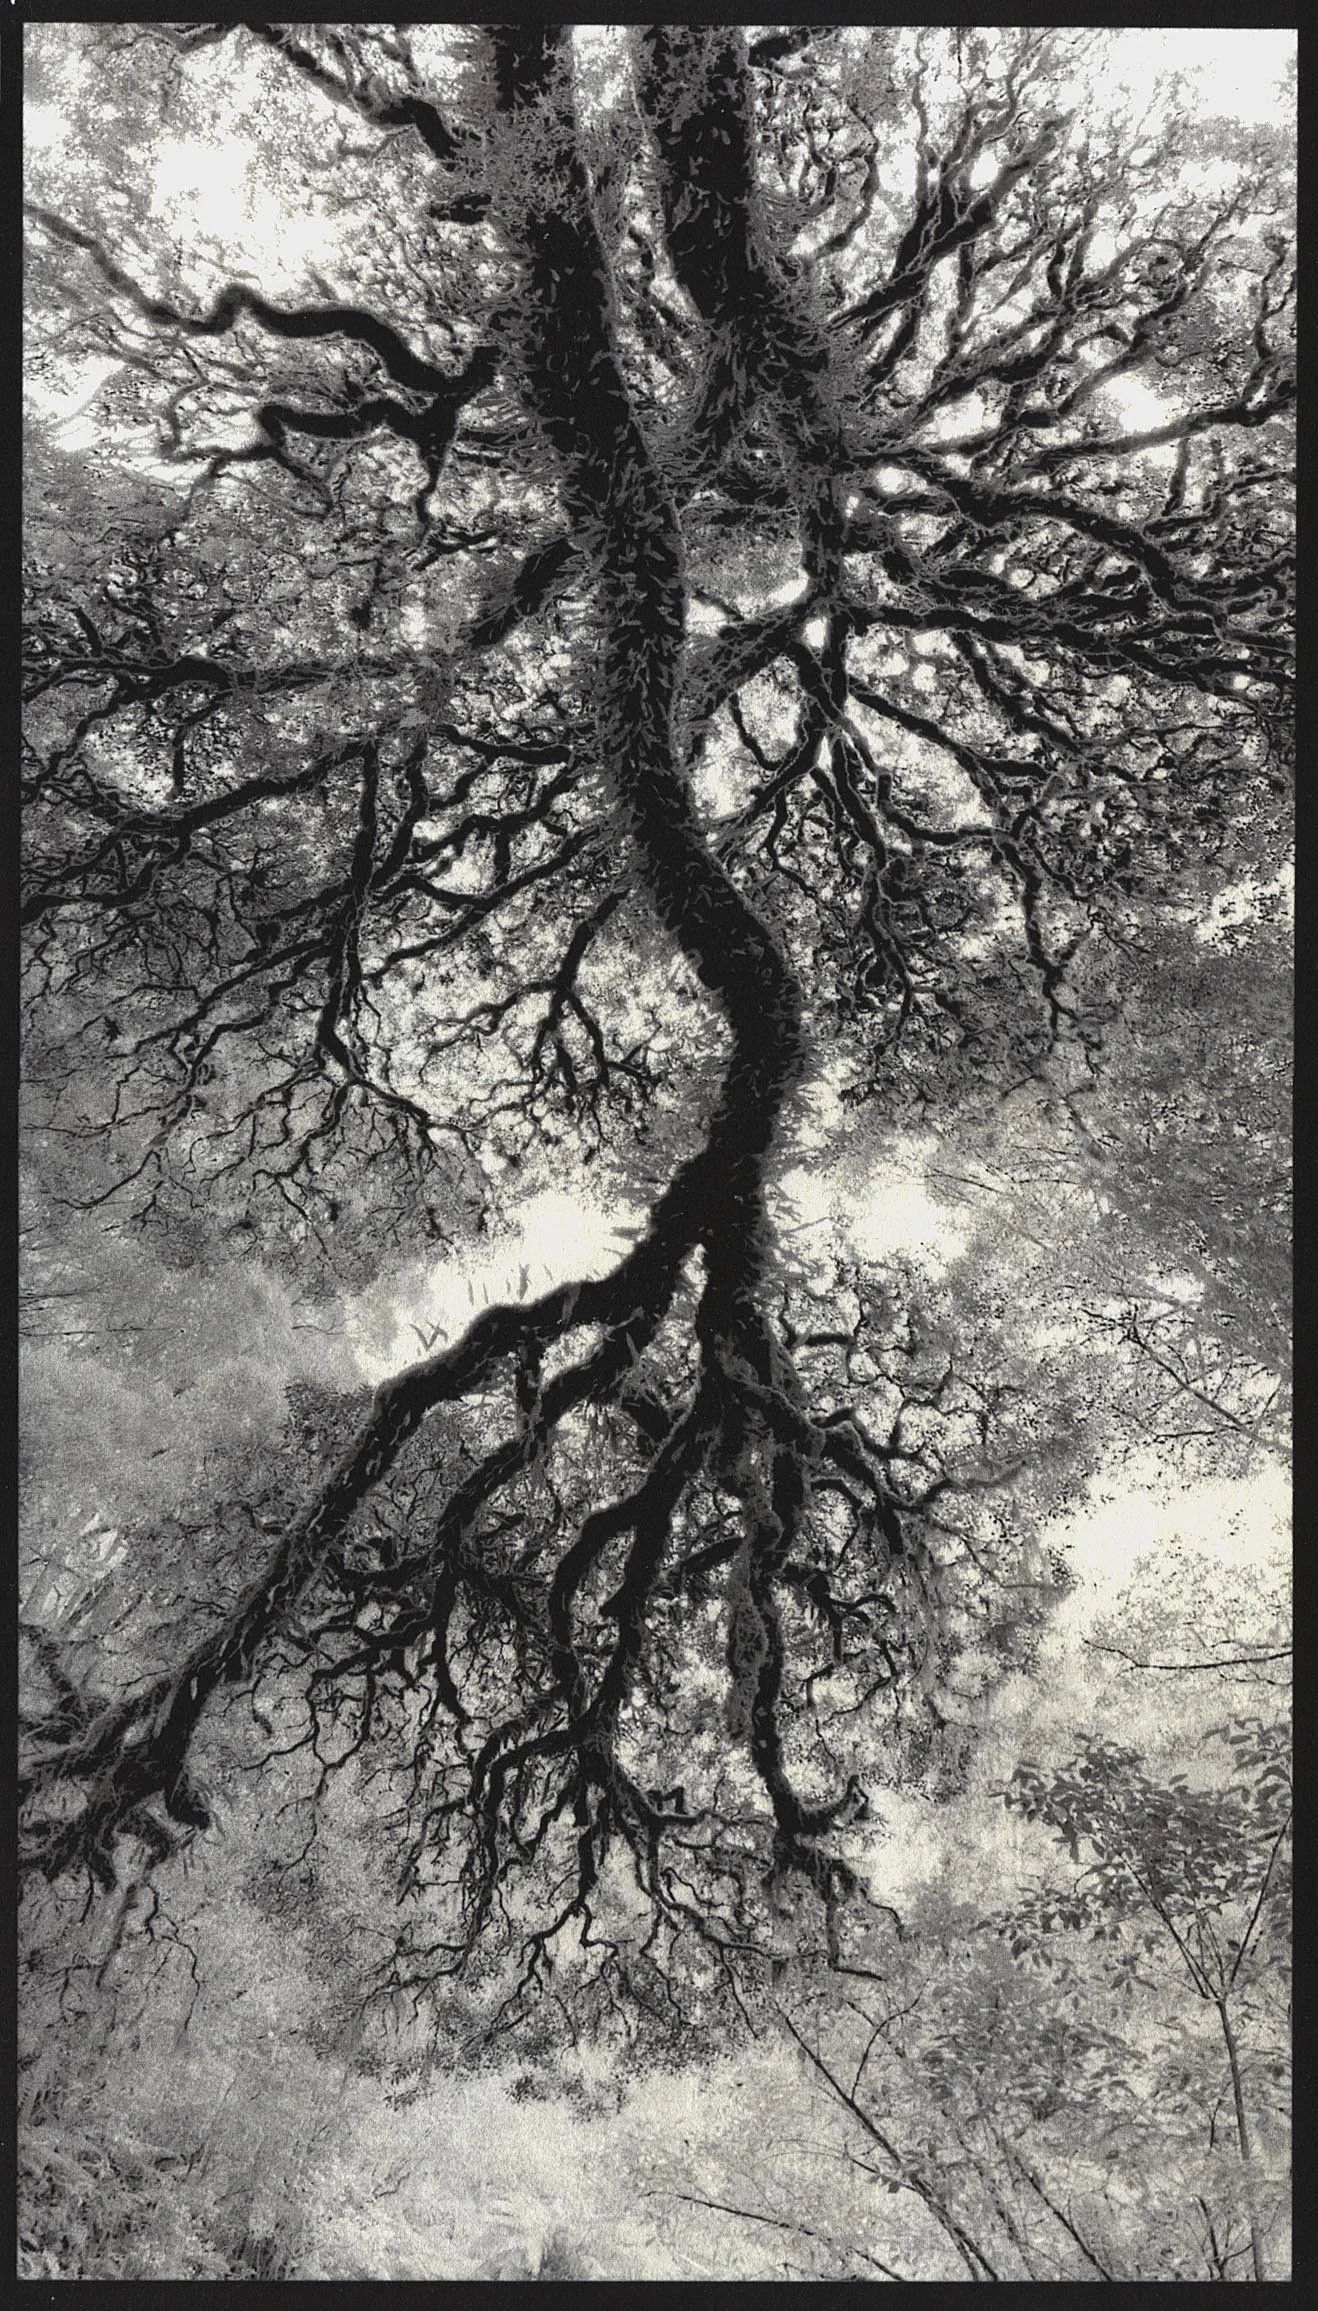
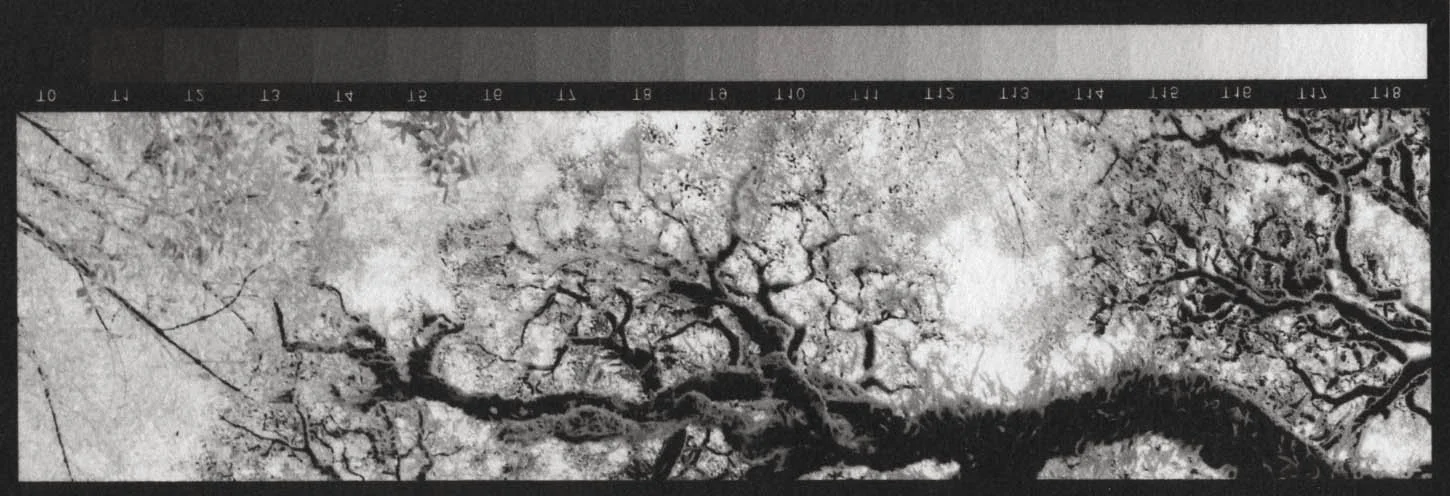
7.1×12.5 inch (18×32 cm) Kallitype print made from a profiled negative without further correction. Photograph & print by John Riches
With a Densitometer
The TruNeg Gradient/Stepwedge and Profiler tool makes this the quickest, simplest, and most
accurate way there is to make a digital negative.

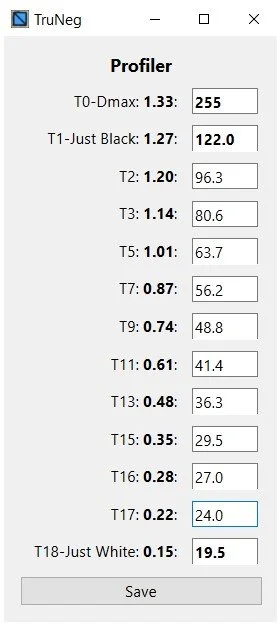
Print the TruNeg Gradient/Stepwedge; find “Just White,” “Just Black,” and 10 intermediate tones; save the Preset; convert and print the negative; print the print.
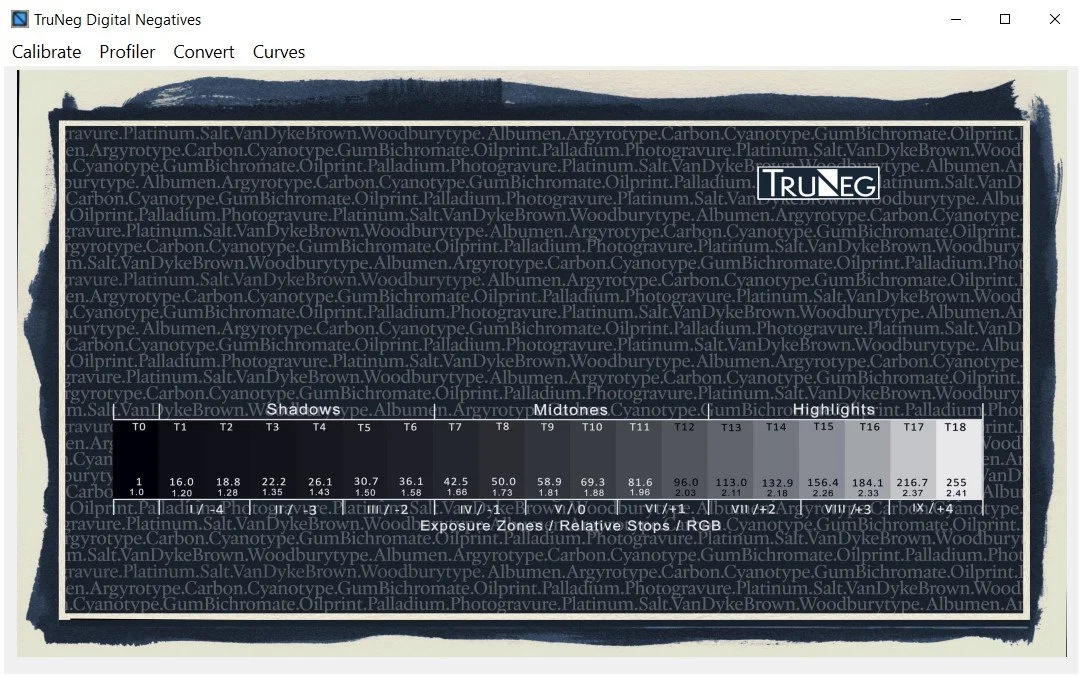
TruNeg Open Screen
The TruNeg Windows Application main page.
Without a Densitometer
TruNeg Profiles and the unique DLogRGB curve provide a methodical pathway to perfect prints.
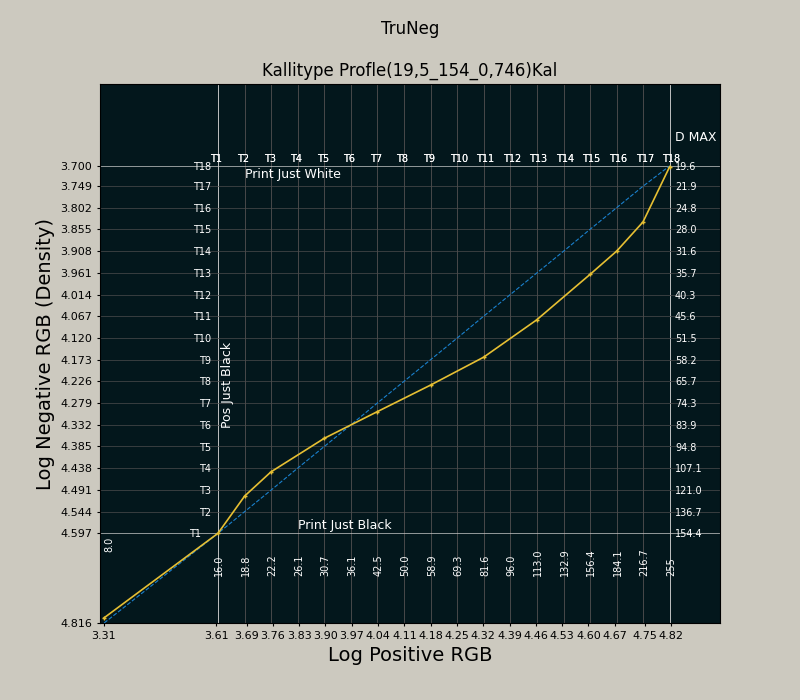
The Kallitype Profile Curve
Adjusting the curve by one grid line changes the test strip stepwedge by one tone, whether in the shadows, midtones, or highlights, removing guesswork and making correcting printer and process variations simple and predictable.
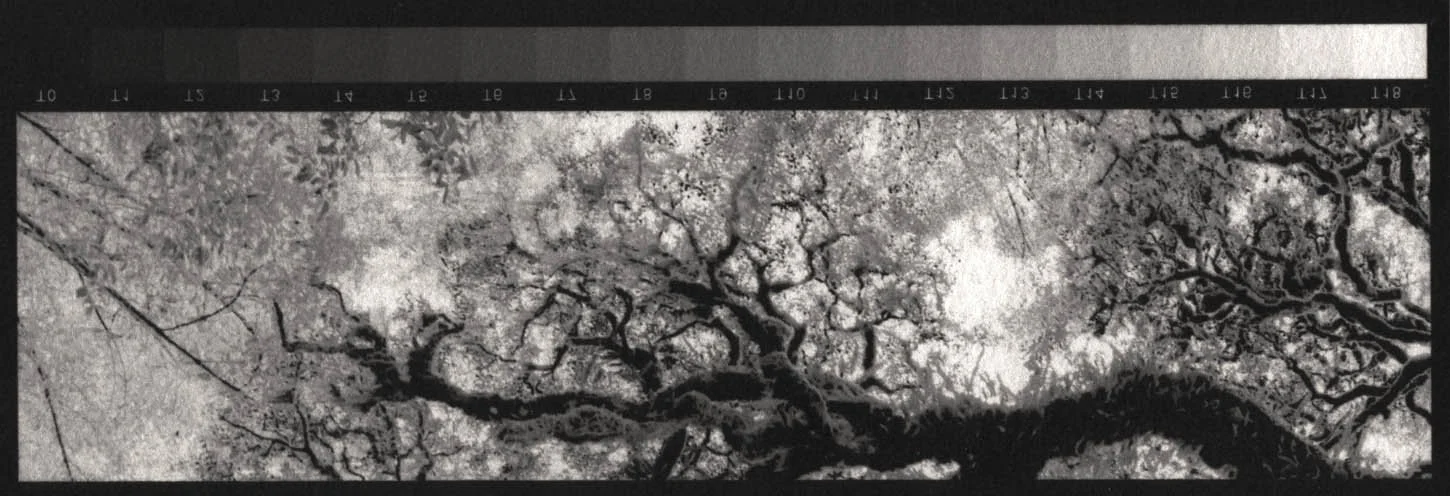
A Test print made from the Profile shows that the highlights and midtones are too light.
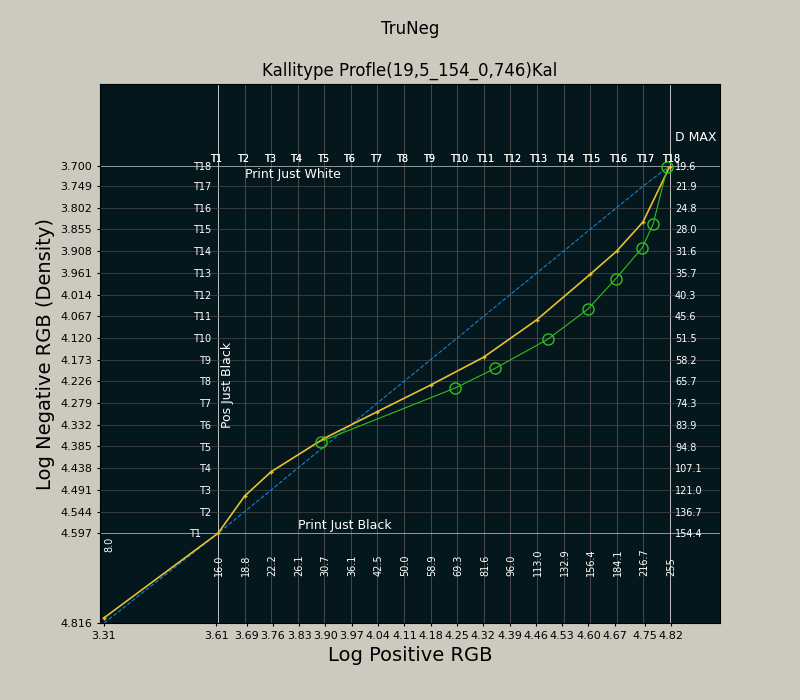
Modifying the Profile curve to darken the highlights and midtones.
[1]. A perfect print is defined here as a print that has a white and a black (Dmax), with all the highlight and shadow detail of the original positive image and that the print is neither too light nor too dark.