Calibrating
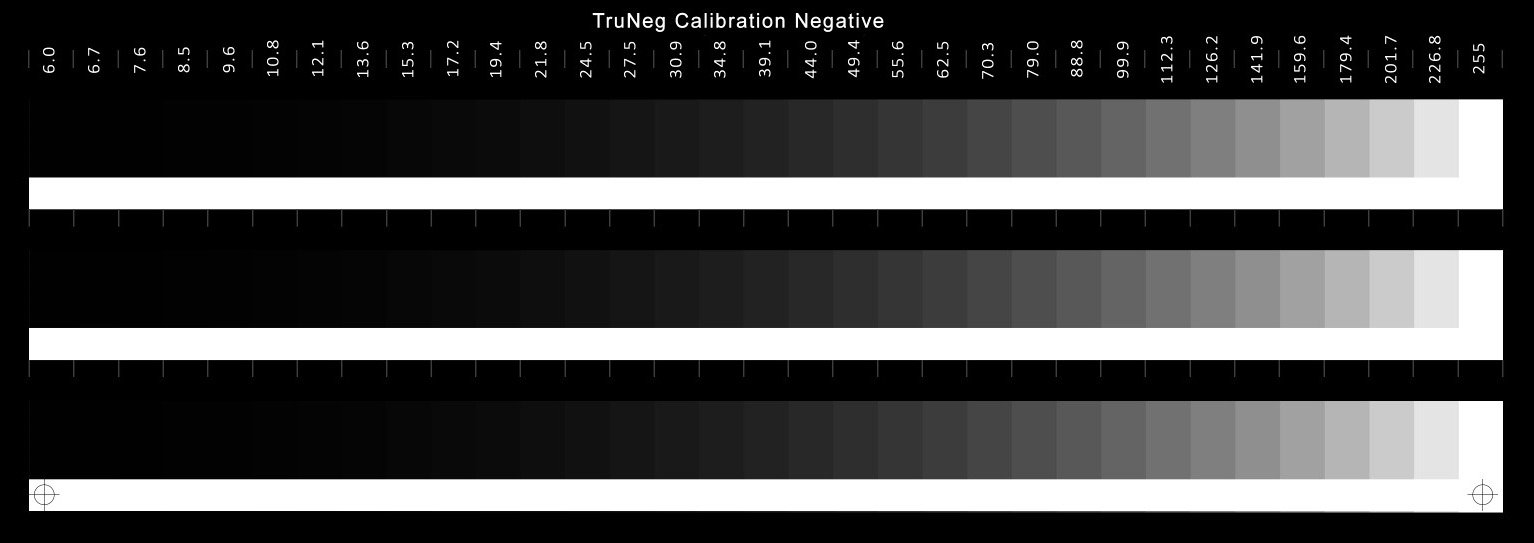
TruNeg Calibration Negative
TruNeg uses a Calibration Negative to identify the negative RGB values that print “just white” and “just black” on the alternative process when printed from a negative printed on the user’s printer.
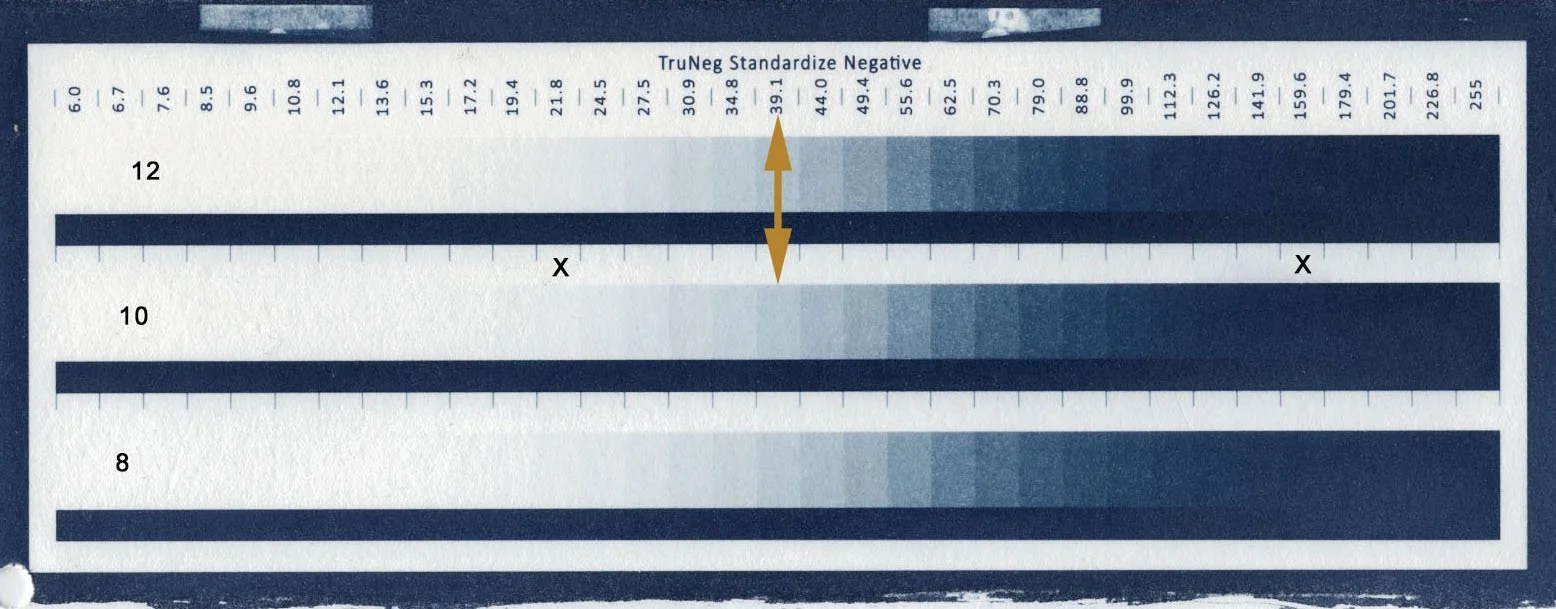
The negative contains three 16-bit, 32-step logarithmic stepwedges ranging from RGB 6 to 255. The 16-bit, 7 MB TIFF file can be downloaded from the Downloads menu.
To calibrate your printer and process, run a test print to determine an exposure time that yields clean white paper tones and a satisfactory maximum density. If you are unsure of the exposure time, the first test should be conducted at stop intervals, e.g., 4, 8, and 16 minutes, aiming for one that is too light and one that is too dark, before narrowing down to plus or minus one or two minutes.
The normal minimum exposure time is when the 201.7 and 226.8 steps cannot be visually separated from the adjacent Dmax clear film strip.
If struggling to get sufficient contrast, which is likely with dye-based inks, it can be doubled by sandwiching two negatives together. Using Fixxon's film results in costs and exposure times that are approximately the same as Pictorico. All the examples and prints shown on this website were made using this technique. See Contrast Masks
Assessing the Calibration Print
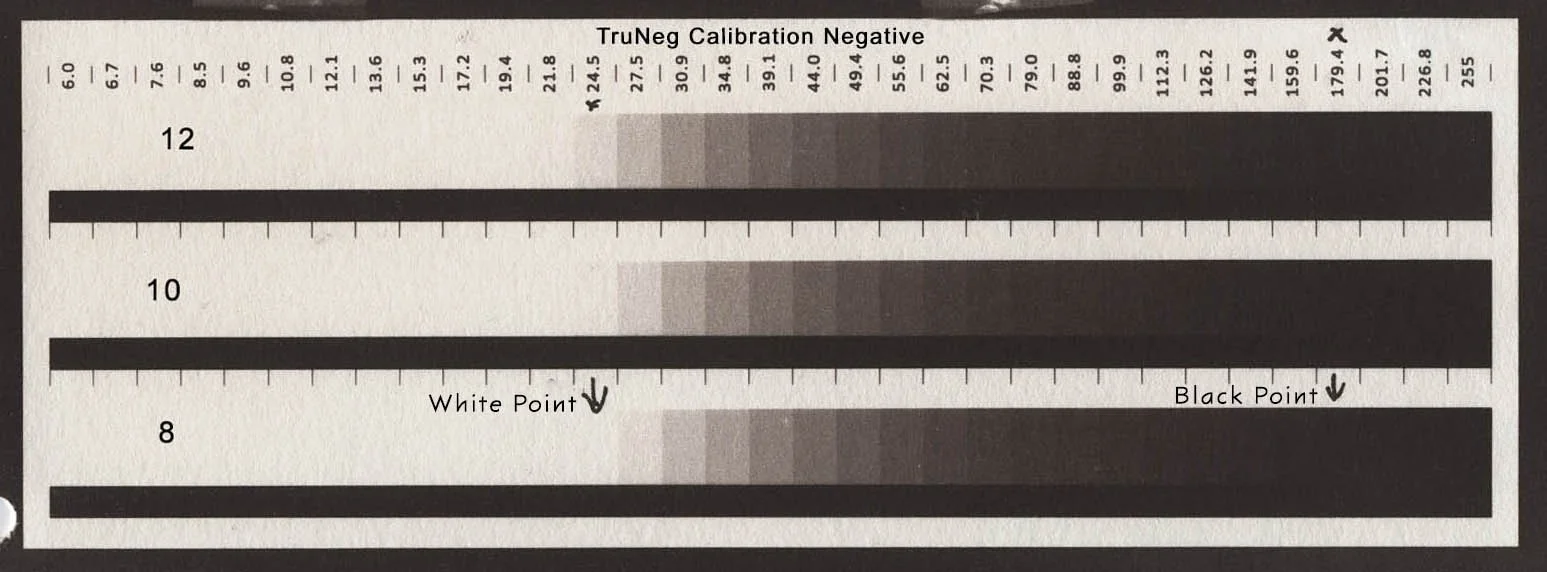
Van Dyke Brown Calibration test print with a “Just White” point at 24.5
and the “Just Black” point at 179.4 for an eight minute exposure.
When you are happy with the exposure, inspect the test print to find the RGB values that print as “just white” and “just black”.
The just white RGB value is assessed against the adjacent white strip and is usually obvious; if there is any doubt, choose the darker step. The just-black RGB value is evaluated against the adjacent Dmax strip and may be less obvious; if in doubt, choose the lighter step.
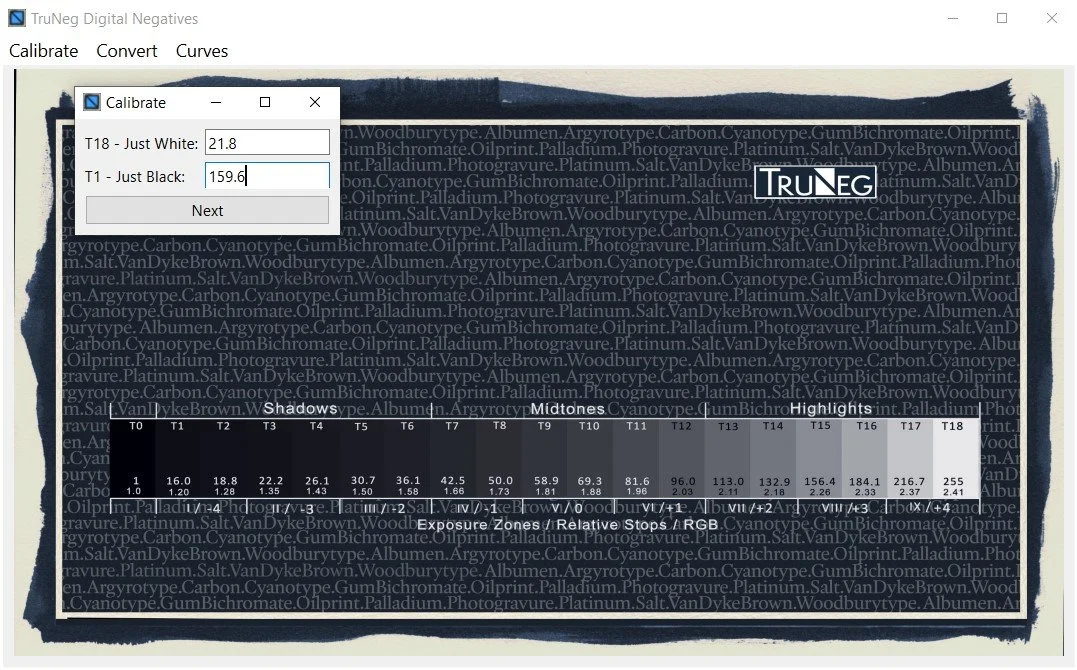
Open the Calibrate menu and follow the prompts and enter the two RGB values and load the profile. When asked to name and save the preset, use a short name that identifies the process and the exposure time in brackets. E.g. VDB(8)
When the file is saved, the RGB values, gamma, and a suffix identifying the profile are automatically added to the filename. e.g., VDB(8)(24,5_179,4_0,72)vdb
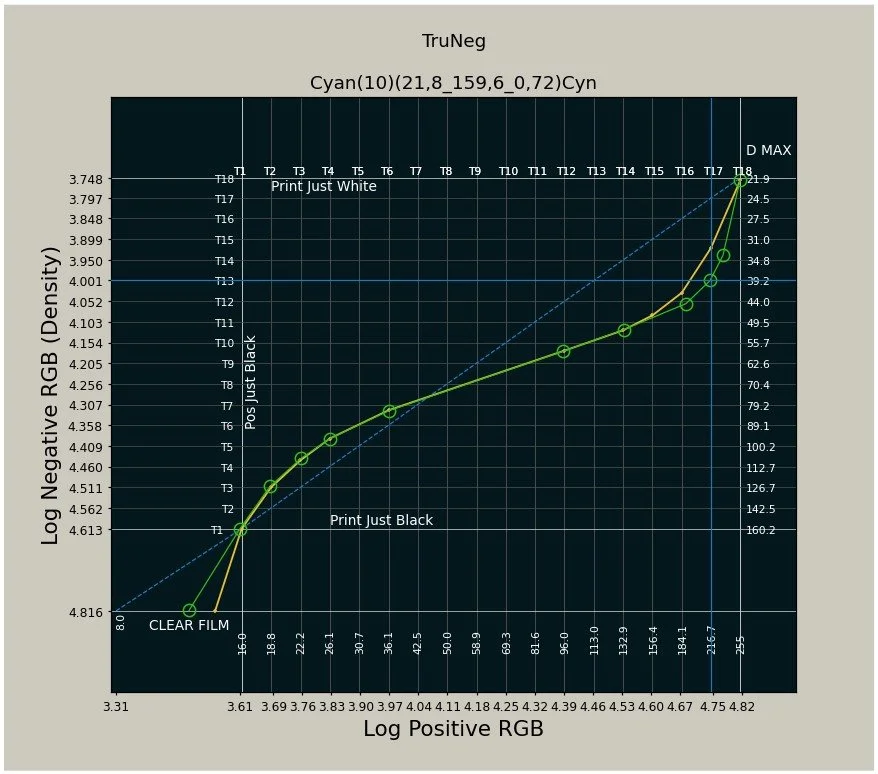
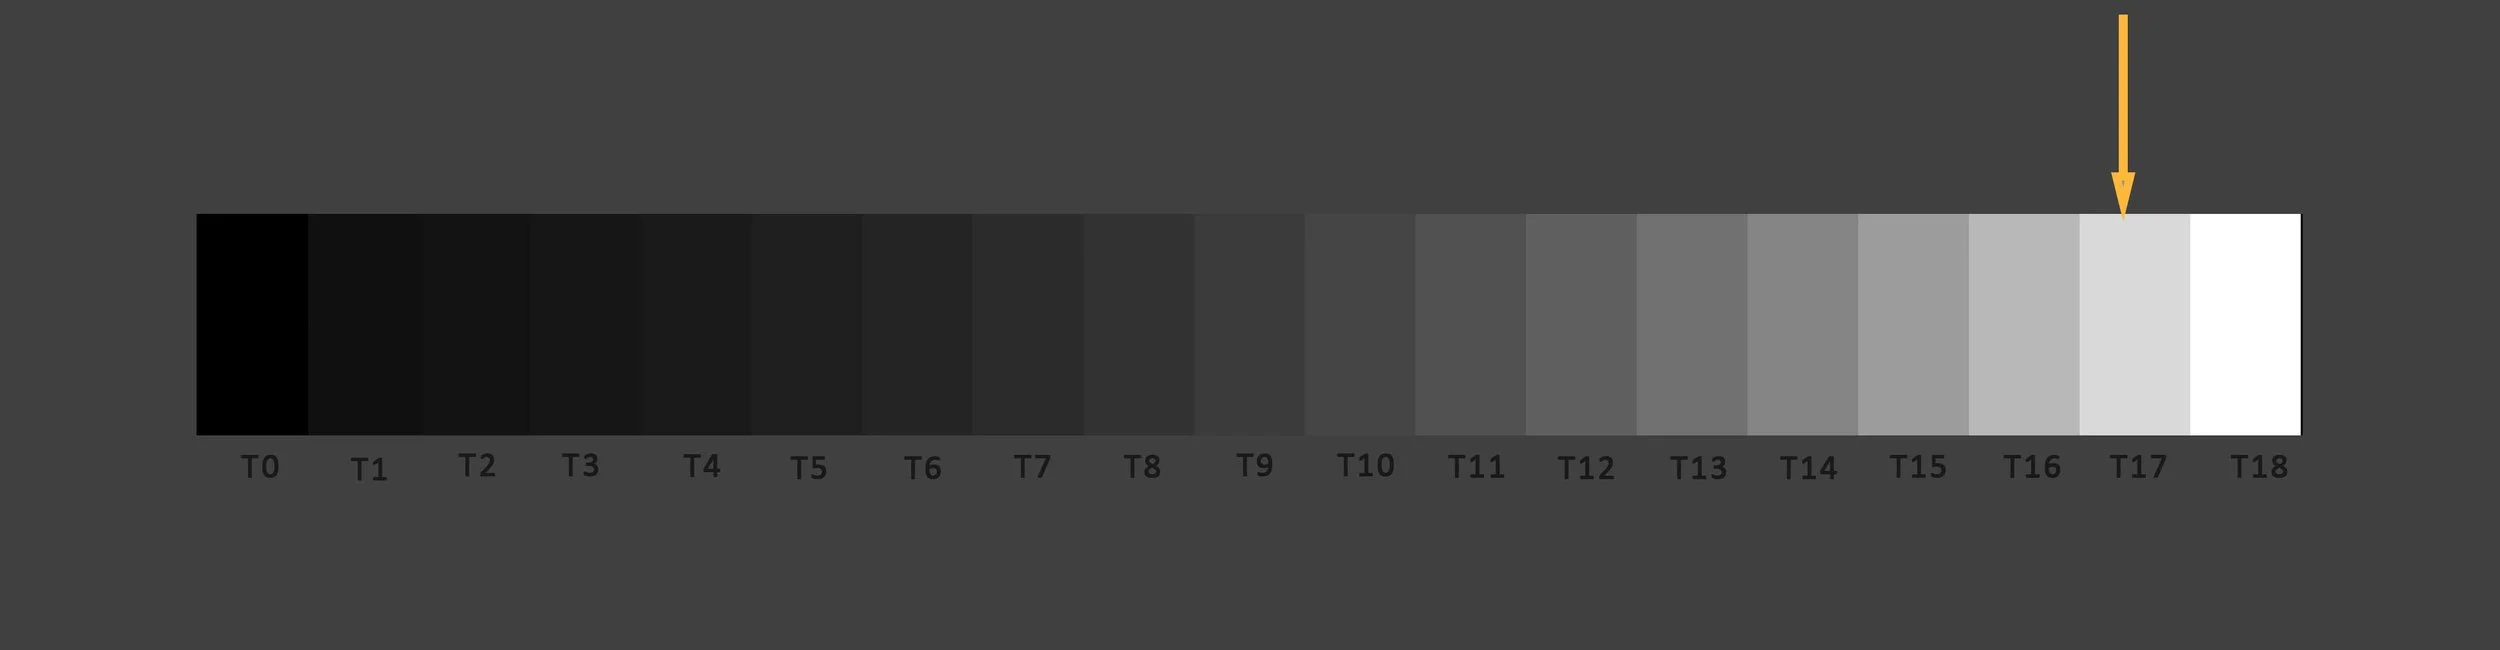
Calibrating T17
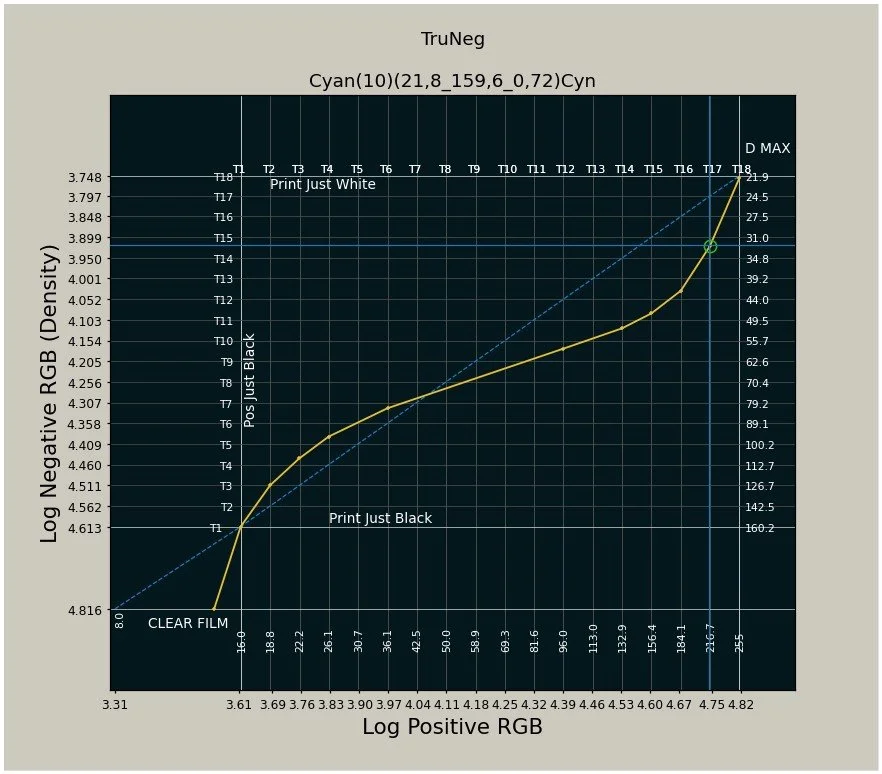
T17 is the first visible print tone and can have a significant effect on the curve, and should be checked against the Calibration test print. After saving the Preset, open the curves window, load the Preset and find the T17 RGB value on the RHS of the plot. In the Classic Cyan Preset shown to the left, the T17 RGB value is approximately 32, but in the Calibration print below, when 21.8 was selected as the “just white", RGB 32 is too light, and the RGB 39 step is the best match for the T17 tone in the TruNeg Stepwedge below. (The stepwedge can be downloaded from the website)
To adjust the curve, place the vertical cursor on the T17 input gridline, align the horizontal cursor with RGB 39 and click to create a control point. Smooth the highlight curve, merge it into the main curve, which may require some re-adjustment, trace over the remaining part, and click on or just below the Clear Film line to save the tweaked preset. The final green circle appears only after the file is saved.