
Settings
The Monitor
The TruNeg website has been optimised for a monitor gamma of 1.8. This has not been done out of personal preference but because a monitor gamma of 1.8 is the closest gamma that reproduces the stop exposure changes in photographic images. As monitor gamma increases, the dark tones are darkened and the lighter tones are stretched, increasing the apparent contrast. The standardised gamma of 2.2 has been established as the best compromise for viewing different document types in the office environment. It is not particularly suitable for viewing images intended for printing on photographic media.
To set up the monitor, download the TruNeg Stepwedge, set the monitor to a gamma of 1.8 and adjust the monitor settings so that T1 on the TruNeg Stepwedge is just detectable from T0. It is suggested that the monitor brightness and contrast be kept relatively low with a warm colour to better match the contrast and appearance of most alternative process prints.
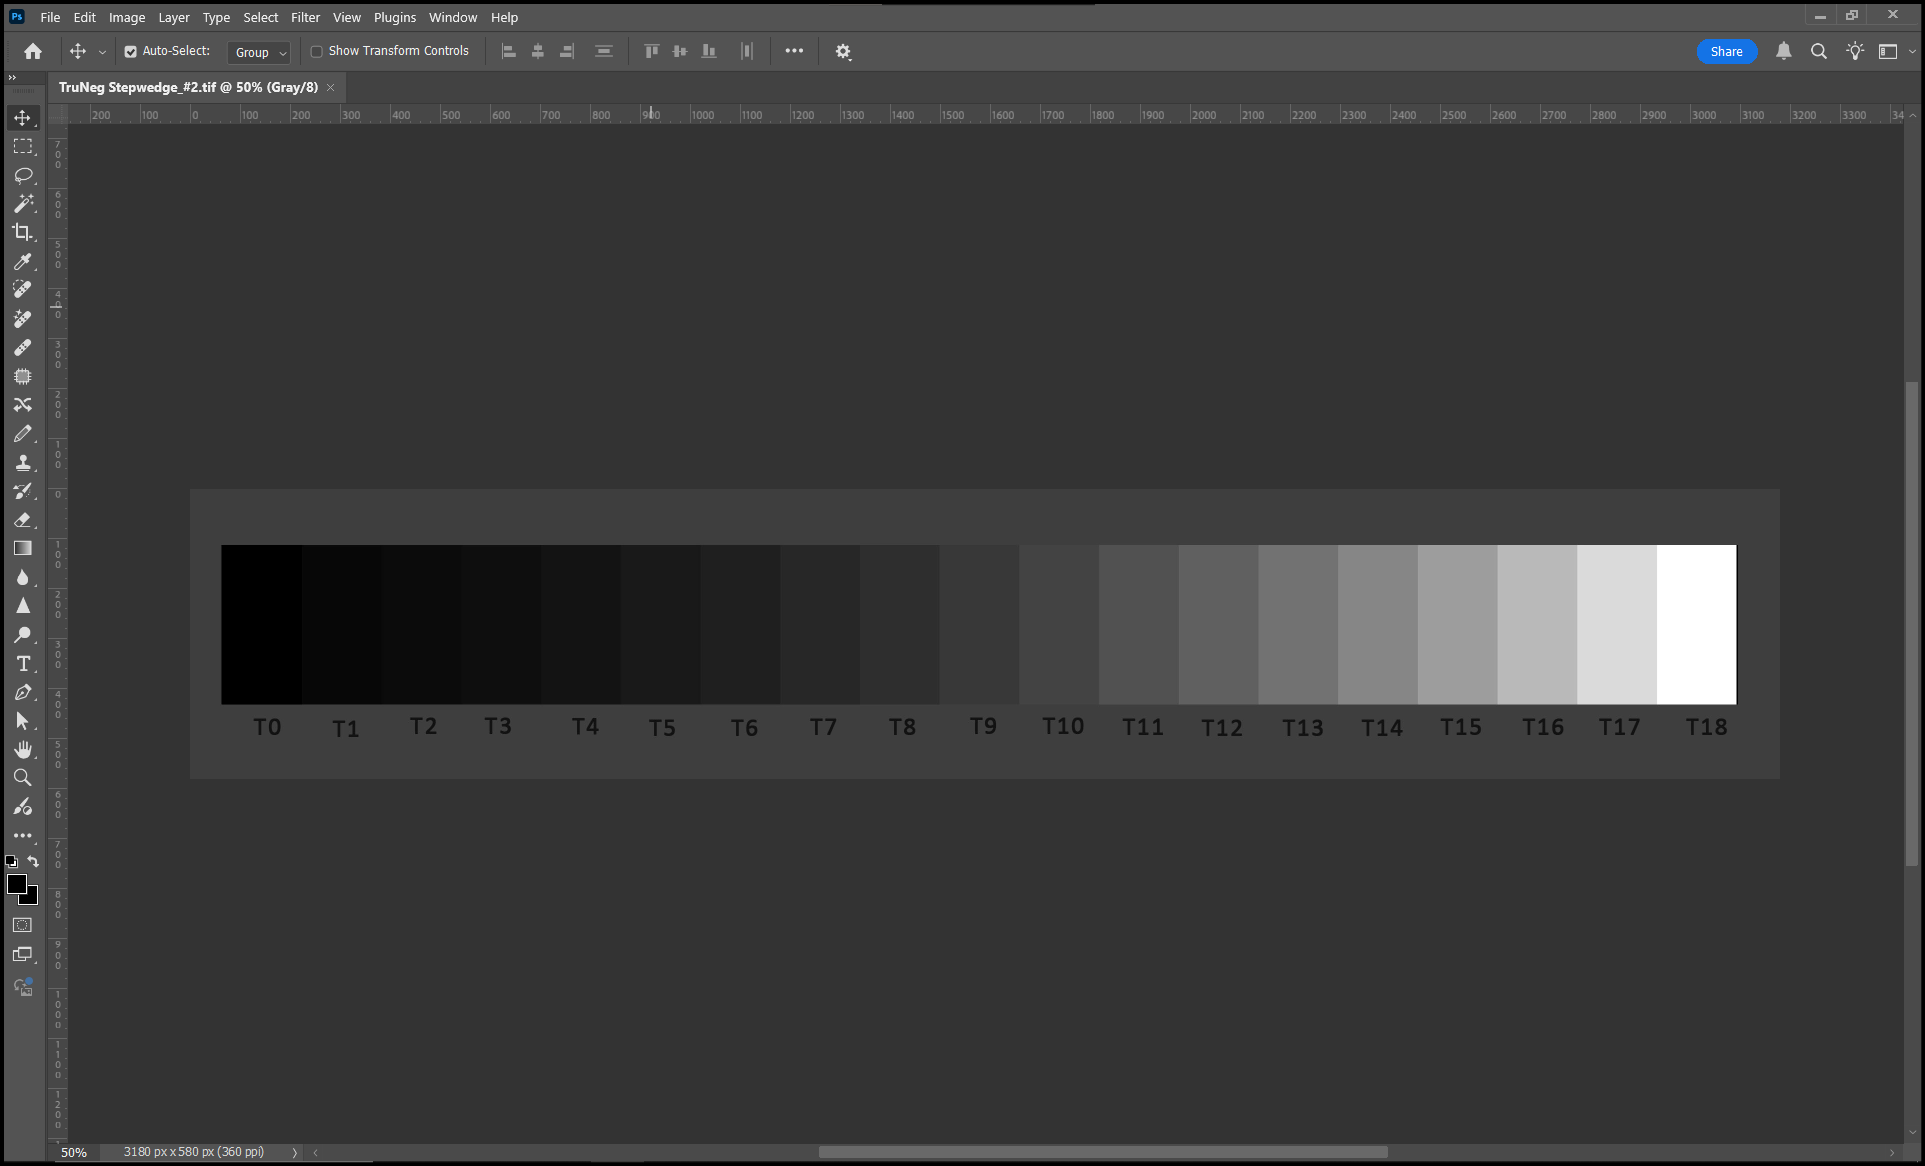
Left pres and hold to enlarge.
Image editing should be done in subdued light on a mid-grey background, as the background tone strongly influences the ability to separate dark tones. On black, they look too light; on white, they look too dark, particularly with the very high brightness of currently available monitors.
Image Files
All files for conversion must be in a 16-bit Grayscale Gamma_2.2 .tiff format. The program only accepts this format. The user should check carefully when converting from colour or another format.
When editing the Grayscale image, the Curve Display Options should be set to show RGB values and not % k.
The Printer
Most modern inkjet printers with two or three black or grey inks can print a convincing monochrome print and therefore can print a good negative if the correct information is provided. However, there is a significant difference in UV opacity between dye- and pigment-based printers, with dye-based inks generally providing insufficient opacity for most alternative processes. This can be significantly improved by using a contrast mask as detailed below, making the full range of processes available to most printers.
There is also much discussion about adding yellow to the negative, which is used to lighten the shadows and midtones on calibration prints from negatives inverted in photographic editing programs. This is unnecessary for TuNeg negatives and is detrimental to the negative.
The contrast can also be very high; I have had reports of Classic Cyanotypes producing disturbingly flat curves on some printers, in which case the contrast can be lowered making sure that the Dmax decreases as the negative’s dark tones are lightened.
The printer’s job is to print a negative with a smooth gradation of neutral tones from the process’s maximum density to paper white. The TruNeg Gradient is a useful tool for testing printer settings, as it shows the overall contrast and smoothness of the printer-process combination. While the individual steps in the Gradient can sometimes be visible on the film, there should be no major jumps or flat spots.
It is suggested that time be spent testing various printer settings and establishing a reliable, repeatable process. A lot of emphasis is often placed on achieving the highest possible Dmax; however, keeping the paper base as clean and white as possible, which is normally a chemistry and development problem, is equally important and requires the same level of attention.

It is beyond the scope of this website and my expertise to provide specific instructions on setting up different printers; however, the following approach has been found to work in Photoshop on a Canon iP8760 printer.
On the Canon printer, using the editing program to manage the colour produces smoother dark tones.
Use a 16-bit printer driver
Use Rendering Intent: Absolute Colorimetric
DO NOT:
Calibrate the printer for printing on paper, as this is likely to reduce the maximum ink density.
Increase or decrease the printer density to make the negative darker or lighter by more than 5 or 6% unless you know that the printer changes the maximum density at the same time. In TruNeg negatives, increasing the density or adding yellow without it increasing the Dmax only makes the negative darker without changing the contrast, producing washed-out prints.
Change the printer settings to adjust print results once the printer settings have been established.
Contrast Masks
The density of a negative can be doubled by registering two negatives. All the prints shown on the website were made from two sandwiched and registered negatives printed on a Canon iP8760 printer.
At half the cost and base density, Fixxons Waterproof film is equivalent to Pictorico in cost and exposure time.
The registration method used is crude but has been found to be effective. Download the Registration Marker file, copy and paste it into the opposite corners in or just outside the image and print two copies of the negative.
(The Gradient/Stepwedge shown below has inbuilt registration markers)
On a lightbox or a sheet of glass suspended over a piece of white paper, tape two adjacent corners on the long side of the face-up negative to the glass, making sure that the film is flat. Fix some small pieces of tape face up to the back of the bottom negative and bend them up so they can be folded over when the negatives are registered.
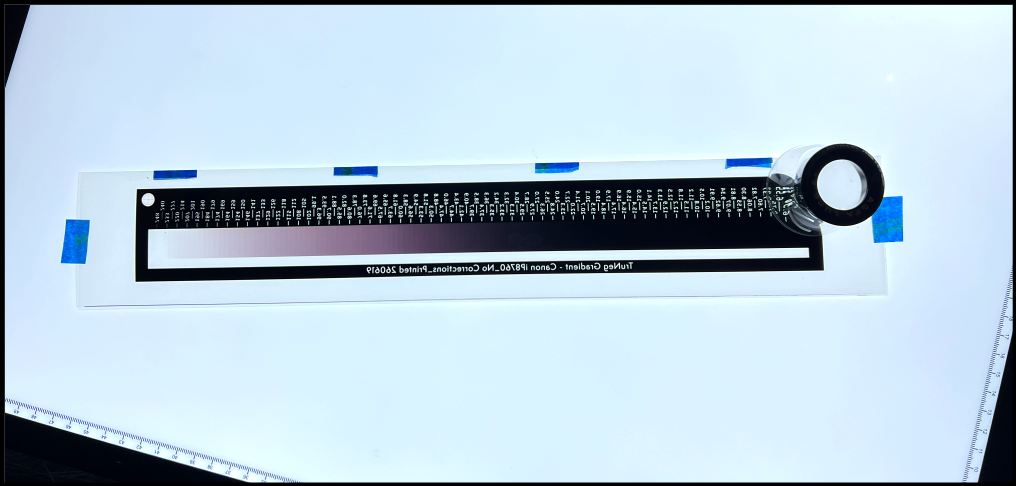
Align one corner using a loupe. When aligned, temporarily tape the top negative as close as possible to the marker while aligning the other. When the second marker is registered, double-check the first. If both are registered, keep both negatives flat with a ruler or similar, then fold the pieces of tape over to hold the negatives together.