Instructions
Below is an outline of how to make and modify a negative with TruNeg
For the full instructions, click the button.
To download a PDF click here
1. Make a Preset
Check that your printer and file settings are correct. See Settings
Download a profile for the process you are using from the website
Print the Calibration Negative with a clean white and acceptable Dmax
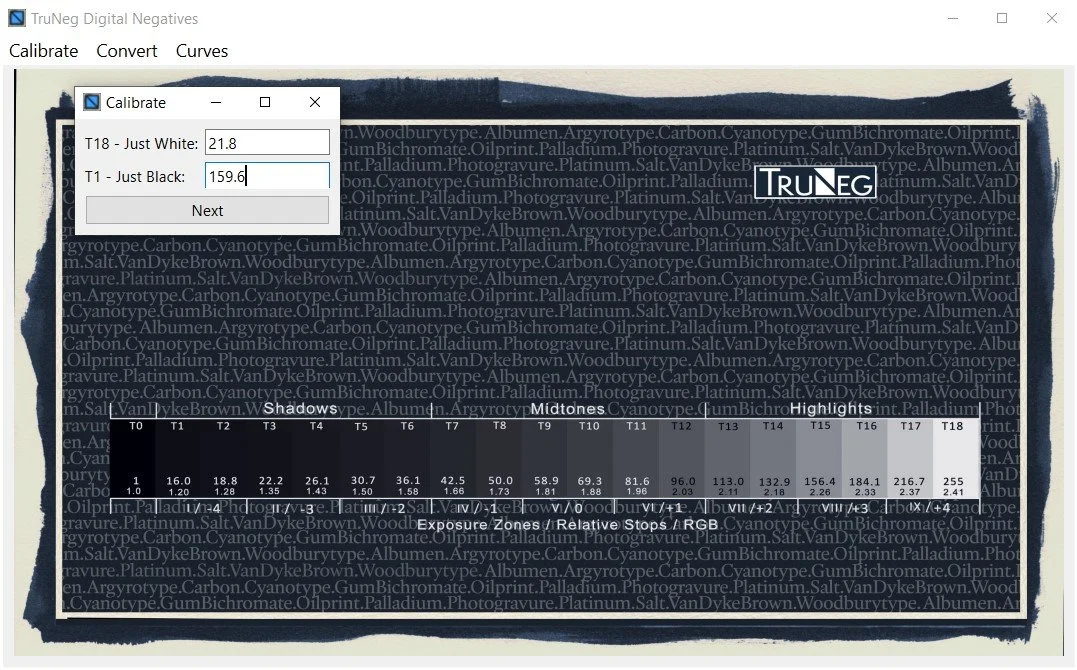
Determine the just white and just black RGB values from the Calibration print.
Open the Calibration menu and enter the RGB values, then, if using a profile, select the
downloaded profile and save the preset.To view the preset, select the preset in the Curves menu.
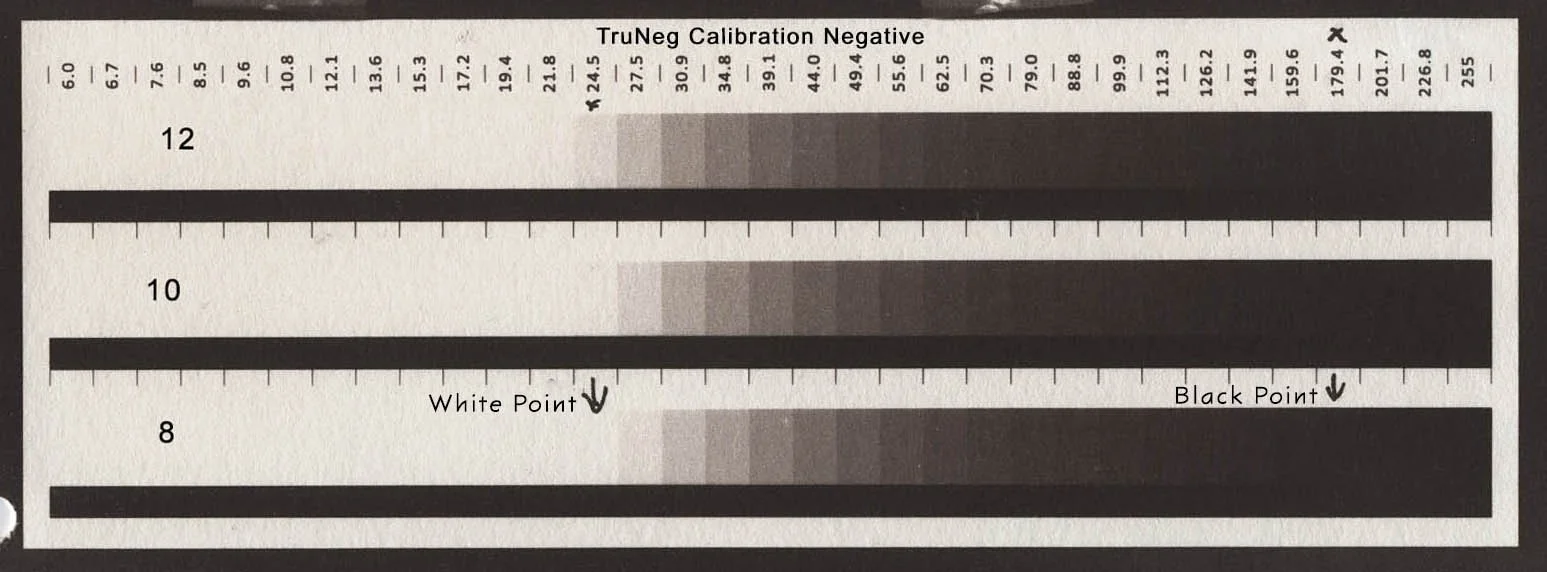
Calibration Test Print
Entering the Just White and Black Values
2. Run a test print
Download the Test Strip Template.
Select a test image to insert into the template.
Open the Convert Menu, select the template, select the preset and press OK to convert.
Print the negative
Print the test print
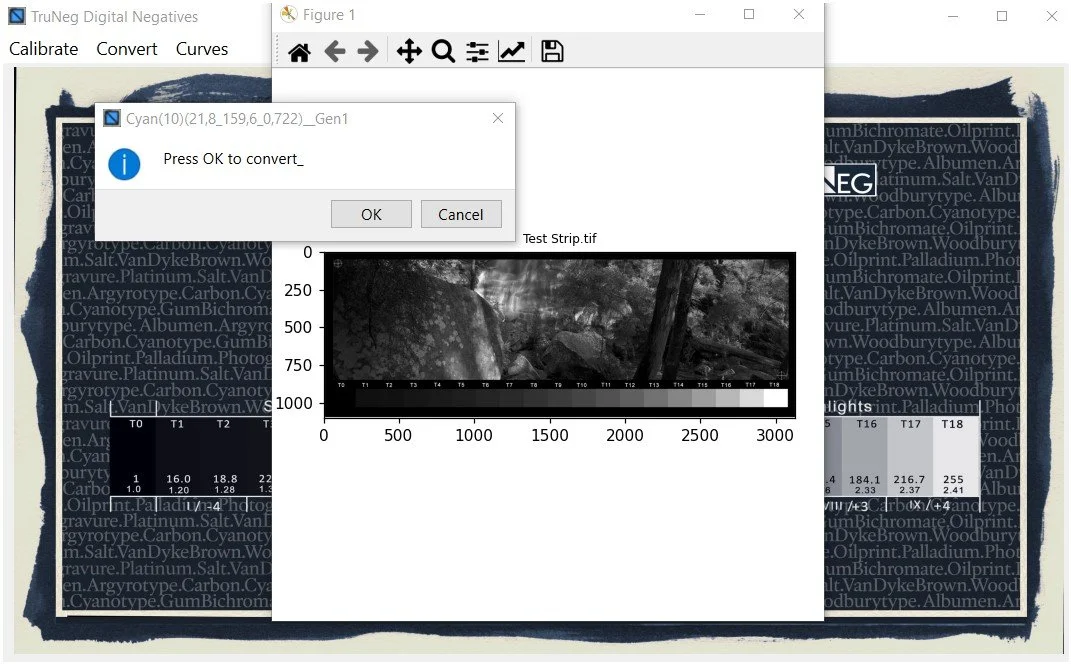
Converting the Negative
3. Tweak the print, if required.
Assess the test strip.
Open the Curve menu and select the preset.
Tweak the curve to lighten or darken unsatisfactory tones.
Run another test strip to confirm

Tweaking a Cyanotype to Darken the Highlights and Shadows